Serves: 50 macaron sandwiches (100 shells)
Prep time: 2 hours
Rest time: 30 minutes - 2 hours, and overnight
Cook time: 60 minutes (12-16 minutes per batch)
Supplies:
Sifter/sieve
Food scale
Spatula
Parchment paper
Baking trays
Large mixing bowls
Electric beaters
Piping bags and tips
Ingredients:
200 g (7 oz) almond meal / flour
220 g (7.8 oz) icing / powdered sugar
4 egg whites, room temperature
80 g (2.8 oz) sugar (I used 'raw', but original recipe calls for caster)
gel food dye, as desired
Chocolate ganache filling:
250 g (8.8 oz) dark baking chocolate
250 g (8.3 fluid oz or 1 cup) heavy cream
50 g (1.75 oz or 3.5 tbsp) unsalted butter, room temp
2.5 tsp+ peppermint extract
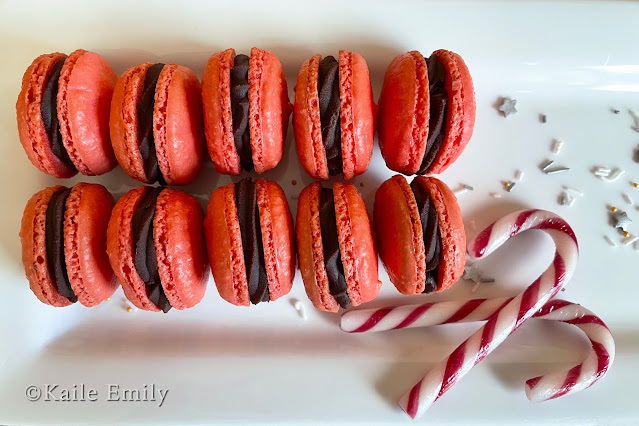
Like the gingerbread macarons, two Decembers ago in the year that shall not be named, I set out to find the perfect peppermint macaron. It was a tough one with both flavours turning out excellent and I was tasked to narrow it down between mint + chocolate ganache vs. a white creamy mint filling. Sorry, ya'll, but the chocolate won out. These peppermint dark chocolate macarons are flavoured to taste, so measure the extract exactly; and slowly add more if desired. To me, there is something about the zing of peppermint and the bite of dark chocolate that is ... je ne sais quoi ... Add that to a pillowy sweet macaron, and the world is over. We're sitting on the couch eating macarons and watching Christmas classics. See you next year. Can't be bothered to do anything else!
Macarons are not scary to make if the directions are followed well. I promise! My very first batch turned out beautifully and delicious. If you are new to macarons or have had a less-than-ideal experience making them in the past, I encourage you to pre-read and use Lauren's macaron-how-to post. It was a great support through the whole process.
Some quick tips:
- Use a food scale, not a conversion to cups, as this is important for batter consistency
- Use quality gel food dye (I used cheap liquid dye and it did not hold colour--see above photo)
- The consistency of the batter matters, so follow each step carefully
- If using Lauren's shell template, pipe them slightly bigger, otherwise you will have a massive army of mini macarons.
- Definitely leave them out to make the skin before baking
If the shells do not turn out perfectly round, it is OKAY. I promise. It was a bit cathartic to sit and match up the mismatched shells to form perfect pairs.
Also, they are 1000x better the following days after the ganache softens the shells. This is a part of the macaron process, so have no fear. You're doing it right.
Ingredients:
200 g (7 oz) almond meal / flour
220 g (7.8 oz) icing / powdered sugar
4 egg whites, room temperature
80 g (2.8 oz) sugar (I used 'raw', but original recipe calls for caster)
gel food dye, as desired
Chocolate ganache filling:
250 g (8.8 oz) dark baking chocolate
250 g (8.3 fluid oz or 1 cup) heavy cream
50 g (1.75 oz or 3.5 tbsp) unsalted butter, room temp
2.5 tsp+ peppermint extract
Directions:
1. Prep baking trays by laying down macaron templates and placing baking paper over. Prep a piping bag with a round nozzle.
2. Sift almond meal and icing / powdered sugar in a fine mesh sieve or sifter. Set aside.
3. Crack the eggs, careful to separate the whites from the yolk and not get any yolk in the whites. Beat egg whites until frothy. Add caster sugar slowly. When egg whites are soft peaks, add dye and then beat to stiff peaks.
4. Gently fold in the dry ingredients into the wet ingredients, careful to scoop and swirl all of the batter around and cut it down the middle each turn until it resembles lava (5-10 minutes). It should drip off a spatula in ribbons and take about 10 seconds to absorb in the batter below. See gifs on Lauren's website for specifics.
5. Gently add the batter to the piping bag and pipe into the circular cut-outs on the baking trays.
6. Carefully remove the circle templates from under the baking paper and rap the baking trays several times on the bench top to release air bubbles. Then let the trays sit out until the macaron shells form a 'skin' that, when touched, is no longer wet or sticky (30 min - 2 hours, depending on air temperature and humidity).
7. Bake macaron shells at 150 C (300 F) for 12-16 minutes, until shells sound hollow when gently tapped.
8. Once removed from the oven, allow the shells to cool for several minutes and gently peel them up off the baking paper and pair up the shells.
9. To make the filling, chop chocolate and place in heat-safe bowl and set aside.
9. To make the filling, chop chocolate and place in heat-safe bowl and set aside.
10. In a small saucepan on low heat, heat the cream to a low simmer (but no higher) and simmer for a few minutes until it reduces slightly.
11. Pour the hot cream over the chocolate and let it set in for a minute.
12. Blend the chocolate and cream with a spatula until well incorporated and then mix in the butter until smooth.
13. Mix in 2-2.5 tsp peppermint extract, then add more to desired taste.
14. Cool the ganache in the fridge until it firms up and is ready to pipe (2+ hours). If the ganache is too runny, melt down more chocolate and add to the ganache. If the ganache is too firm to pipe, reheat on the stove and add a bit more cream. Both adjustments will require the ganache to be cooled back down before piping.
15. Pipe the ganache onto half of the macaron shells and sandwich them together with their paired macaron match.
16. Store the macarons in an airtight container in the fridge overnight. The texture of these macarons are at their prime between 2 days and 7 days after filling and storing.
Comments
Post a Comment